Gluten Free Holiday Cookie Exchange
Posted: November 12, 2013 Filed under: Celiac Disease | Tags: baking, cookie exchange, cookie swap, gluten free, holiday Leave a comment
Last year I hosted a Gluten Free Cookie Exchange at the holidays – and it was terrific! I know I took a picture of the cookie spread, but for the life of me I can’t find it. So I will add the photo if I ever come across it. I think we had 10 bakers and we did batches of 8 cookies. The presentations were beautiful and the cookie variety was awesome! From memory we had: gf no bake cookies, gf chewy cherry cookies, gf cheese cake brownies, gf toffee cookies, gf homemade mounds bars, gf peanut butter crispy rice treats, gf macaroons, gf almond-flavored wreath cookies, and gf buckeyes! All of the cookies were delicious – their gluten free nature drew no attention to itself. Some of the bakers typically follow a gluten free lifestyle, and know the ins and outs of baking celiac safe goodies. Some of the other bakers do not follow a gluten free diet – but they were very willing to learn how to bake in a celiac safe fashion. (Big shout out to my wonderful family for embracing the gluten free thing!) Therefore I provided the following guidelines on gluten free baking.
- Wipe down counters, cutting boards, and any surfaces that you’ll be working on. If you are using a mixer, wipe down the mixer too.
- Peanut Butter is gluten free.
- Nestle Toll House chocolate chips are gluten free.
- Rice Krispies are NOT gluten free – although you can find “gluten free” crispy rice cereal (the box will be clearly labeled as gluten free).
- Oats are not usually gluten free, but you can easily find gluten free oats – Trader Joe’s has them and the brand Bob’s Red Mill also makes them. They are labeled as “gluten free, pure, uncontaminated oats”, etc.
- Check to make sure any candy that you use is gluten free. For example, licorice is NOT gluten free.
- Fresh packages of sugar, butter, gluten free flour, peanut butter, etc. are ideal in order to avoid cross-contamination.
- “When in doubt, leave it out” – If you have any questions, just let the host know!
Qiller Quiche with Grain Free Crust
Posted: November 5, 2013 Filed under: Grain Free, Poultry, Vegetables | Tags: almond flour pie crust, broccoli, egg, jerf, paleo, primal, quiche, real food, scd legal, Vegetarian 1 Comment
omg – I made this quiche this week and it was so good. I loved it. I know it’s funny to love your own cooking, but dang this was good! It was a cheesy broccoli quiche made with an almond flour crust. For the crust I used the recipe from my cookbook Turtle Soup – which is an SCD cookbook. Here is a similar crust recipe that I found online – I used butter but this recipe uses coconut oil.
http://www.elanaspantry.com/paleo-pie-crust/
The crust was easy to make. It took a long time, but each step along the way was easy. Most of the time was spent on the dough chilling, so you can chill also and it’s not labor-intensive. Then I beat 4 eggs, and mixed it with about 1 1/2 cups of cooked broccoli (steamed/boiled in a brine) and about one cup of shredded “mexican blend” cheese. (Fresh shredded cheese of course would be a better choice.) I poured it into the cooked pie crust and baked it in the oven at 350 degrees. I then forgot that I had it in the oven until I noticed the delicious aroma that reminded me. It was about 30 minutes. Fortunately it had not burned and I pulled a beautifully-done quiche out of the oven. Who needs timers, right?! I am already craving another batch of this quiche.
Chicken Lentil Soup
Posted: October 29, 2013 Filed under: Poultry, Vegetables | Tags: broth, Carrot, Celery, Chicken, grain free, homemade, Lentil, real food, scd legal, soup Leave a comment
This recipe rivals the yummy lentil soups served at Middle Eastern restaurants!
Ingredients
1 bunch scallions
1 small bunch of celery (small because it was organic)
5 carrots
About 1 1/2 tablespoons sea salt
16 oz red splits lentils (I get mine from Edison Grainery)
1 1/2 tablespoons marjoram
1 1/2 tablespoons parsley
4 cups of chicken broth (homemade if possible!)
About 8 oz of frozen cooked cubed chicken breast (I batch cook this and freeze it)
6 cups of water
Directions
Heat olive oil in a large soup pot on medium heat. When pan is hot, add the scallions, carrots, celery, and salt. Sautee for 20 minutes. Add chicken broth (mine was frozen when I put it in the pot), lentils, marjoram, parsley, cooked chicken, and water. Bring to a boil, then cover and simmer for 20 to 30 minutes. The lentils cook very fast, so this is a pretty quick recipe. Another “One Pot Wonder” – if you don’t know already, I love simple quick recipes using real food ingredients. 🙂 Always taste to make sure the salt content is right.
The Easiest Applesauce Ever
Posted: October 29, 2013 Filed under: Sweets | Tags: applesauce, crock pot, easy, homemade, paleo, recipe, scd, Vegan, Vegetarian Leave a comment

If this really is “The Easiest Applesauce Ever”, then it must be made in a crock pot. Yup, it is!!! Get out your crock pot (large size) and 24 red delicious apples. Peel and core the apples, and chop them into large pieces. When I do this, I slice off the top, then the bottom of all the apples. Then I peel all the apples. Then I cut each side from the core – which means there’s a little bit of apple thrown away with the core, but it’s so much faster than chopping down the center of the apple. I chop the sides into a few large pieces and then throw all of them into the crock pot and add 1 1/2 cups of water. Turn crock pot to high. Come back 4 to 6 hours later, and you have applesauce. You could leave it chunky, but I like to puree it in my Vitamix when it cools. I don’t add anything else because I like the pure form of applesauce. Straight up Red Deliciousness!

Shire Stew
Posted: October 29, 2013 Filed under: Meat | Tags: gluten free, grain free, homemade, real food, shire stew, soup Leave a commentThis recipe is a fall favorite in my household – even the little kids like it. It makes the house smell so good while it is cooking!

Ingredients
Olive Oil for sauteeing
1 bunch Scallions
5 Carrots
1/2 stalk Celery
About 1/2 pound Green Beans
2 pounds Grass Fed Ground Beef
About 8 medium sized Potatoes
1 1/2 tsp Parsley
1 tsp Sage
1/2 tsp Rosemary
1 1/2 Marjoram
Salt to taste (I use 1 to 2 tablespoons of sea salt)
8 cups water
Corn Starch to thicken (optional)

Directions
Have your meat defrosted if not already. Prep and chop the scallions, the carrots, the celery, and the green beans. Peel and chop the potatoes; set them aside. In a large soup pot, cover the bottom in olive oil and set the heat to medium. When the oil is hot, add the scallions, carrots, celery, green beans, and salt and sautee for about 15 minutes. The veggies should be soft/translucent. Add the ground beef and herbs to the veggie mixture and cook until the beef is all browned. Then add the chopped potatoes and the water. Bring to a boil, then cover and simmer for at least a half hour. If you have time, you can simmer longer for a richer flavor. I used to add corn starch to thicken, but I don’t anymore. If you want to add corn starch, do so after you are done simmering the stew and it’s been off the heat for a bit. Then stir in a 1/2 cup or more of the corn starch and it will thicken as the stew continues to cool. Be sure to taste it so see if it has the right amount of salt. I love my “One Pot Wonder” meals!
Clean the Cupboard Trail Mix (Gluten Free)
Posted: October 3, 2013 Filed under: Uncategorized | Tags: easy, gluten free, homemade, nuts, snack, trail mix, Vegan, Vegetarian Leave a comment
This ranks up there as one of the easiest recipes ever – homemade trail mix from ingredients that are already in your cupboard. Today’s mix features the following unique ingredients:
- Walnuts (produced in a facility where wheat was NOT present)
- Cashews (same for the cashews)
- Arrowhead Mills Puffed Rice Cereal (first time featured in trail mix for me)
- Glutino Pretzel Sticks (we gluten free folks have these stuffed in every corner of our lives, don’t we?)
- Angie’s Sweet & Salty Kettle Corn (Certified GF Costco purchase)
- Nestle Chocolate Chips (but I have Enjoy Life mini chips on the shelf too, for a vegan mix)
- Sun Maid Organic Raisins (from Costco, they have proved their shelf life, just sayin’)
Pour them into a large mixing bowl and mix. Transfer to a gallon sized ziplock bag. Enjoy a little every day til it’s gone. 🙂
Chili meets Dirty Rice
Posted: September 19, 2013 Filed under: Gluten Free Grains, Vegetables | Tags: chili, Dirty Rice, easy, gluten free, one pot dish, Vegetarian 2 Comments


 ≈
≈ 
I love this recipe – it is based on a dish that my Mom made when I was growing up. Her dish was called “Texas Hash” and I still make that version sometimes. So here is Chili meets Dirty Rice.
Sautee chopped onions and bell peppers in olive oil in a good sized pot. Add salt to taste. After those veggies look translucent, add 2 cans of drained cooked beans. I frequently use black beans and kidney beans. Add 2 cans of undrained diced tomatoes, about a cup and a half of rice (brown, white, quinoa, whatever…), and about 2 tablespoons of taco seasoning. I mix my own taco seasoning from Penzey’s spices that I have in the cupboard. Add about 2 cups of water and bring to a boil. Then cover and reduce heat to low and simmer until the rice absorbs the water, about 30 minutes. And that’s it! Super simple. It’s ready when it’s cool enough to eat. Top with shredded cheese, sour cream, and/or any of your favorite chili toppings!
Batch Cooking and Freezing
Posted: September 19, 2013 Filed under: Celiac Disease Leave a comment
My household has 2 adults and 3 young kids. We are blessed with celiac disease in the household, therefore we do essentially all of our cooking at home. Dining out is saved for social occasions, maybe once or twice a month. I’m so glad that I actually like cooking – but with the volume of food prep that we do at home, batch cooking and freezing is necessary.
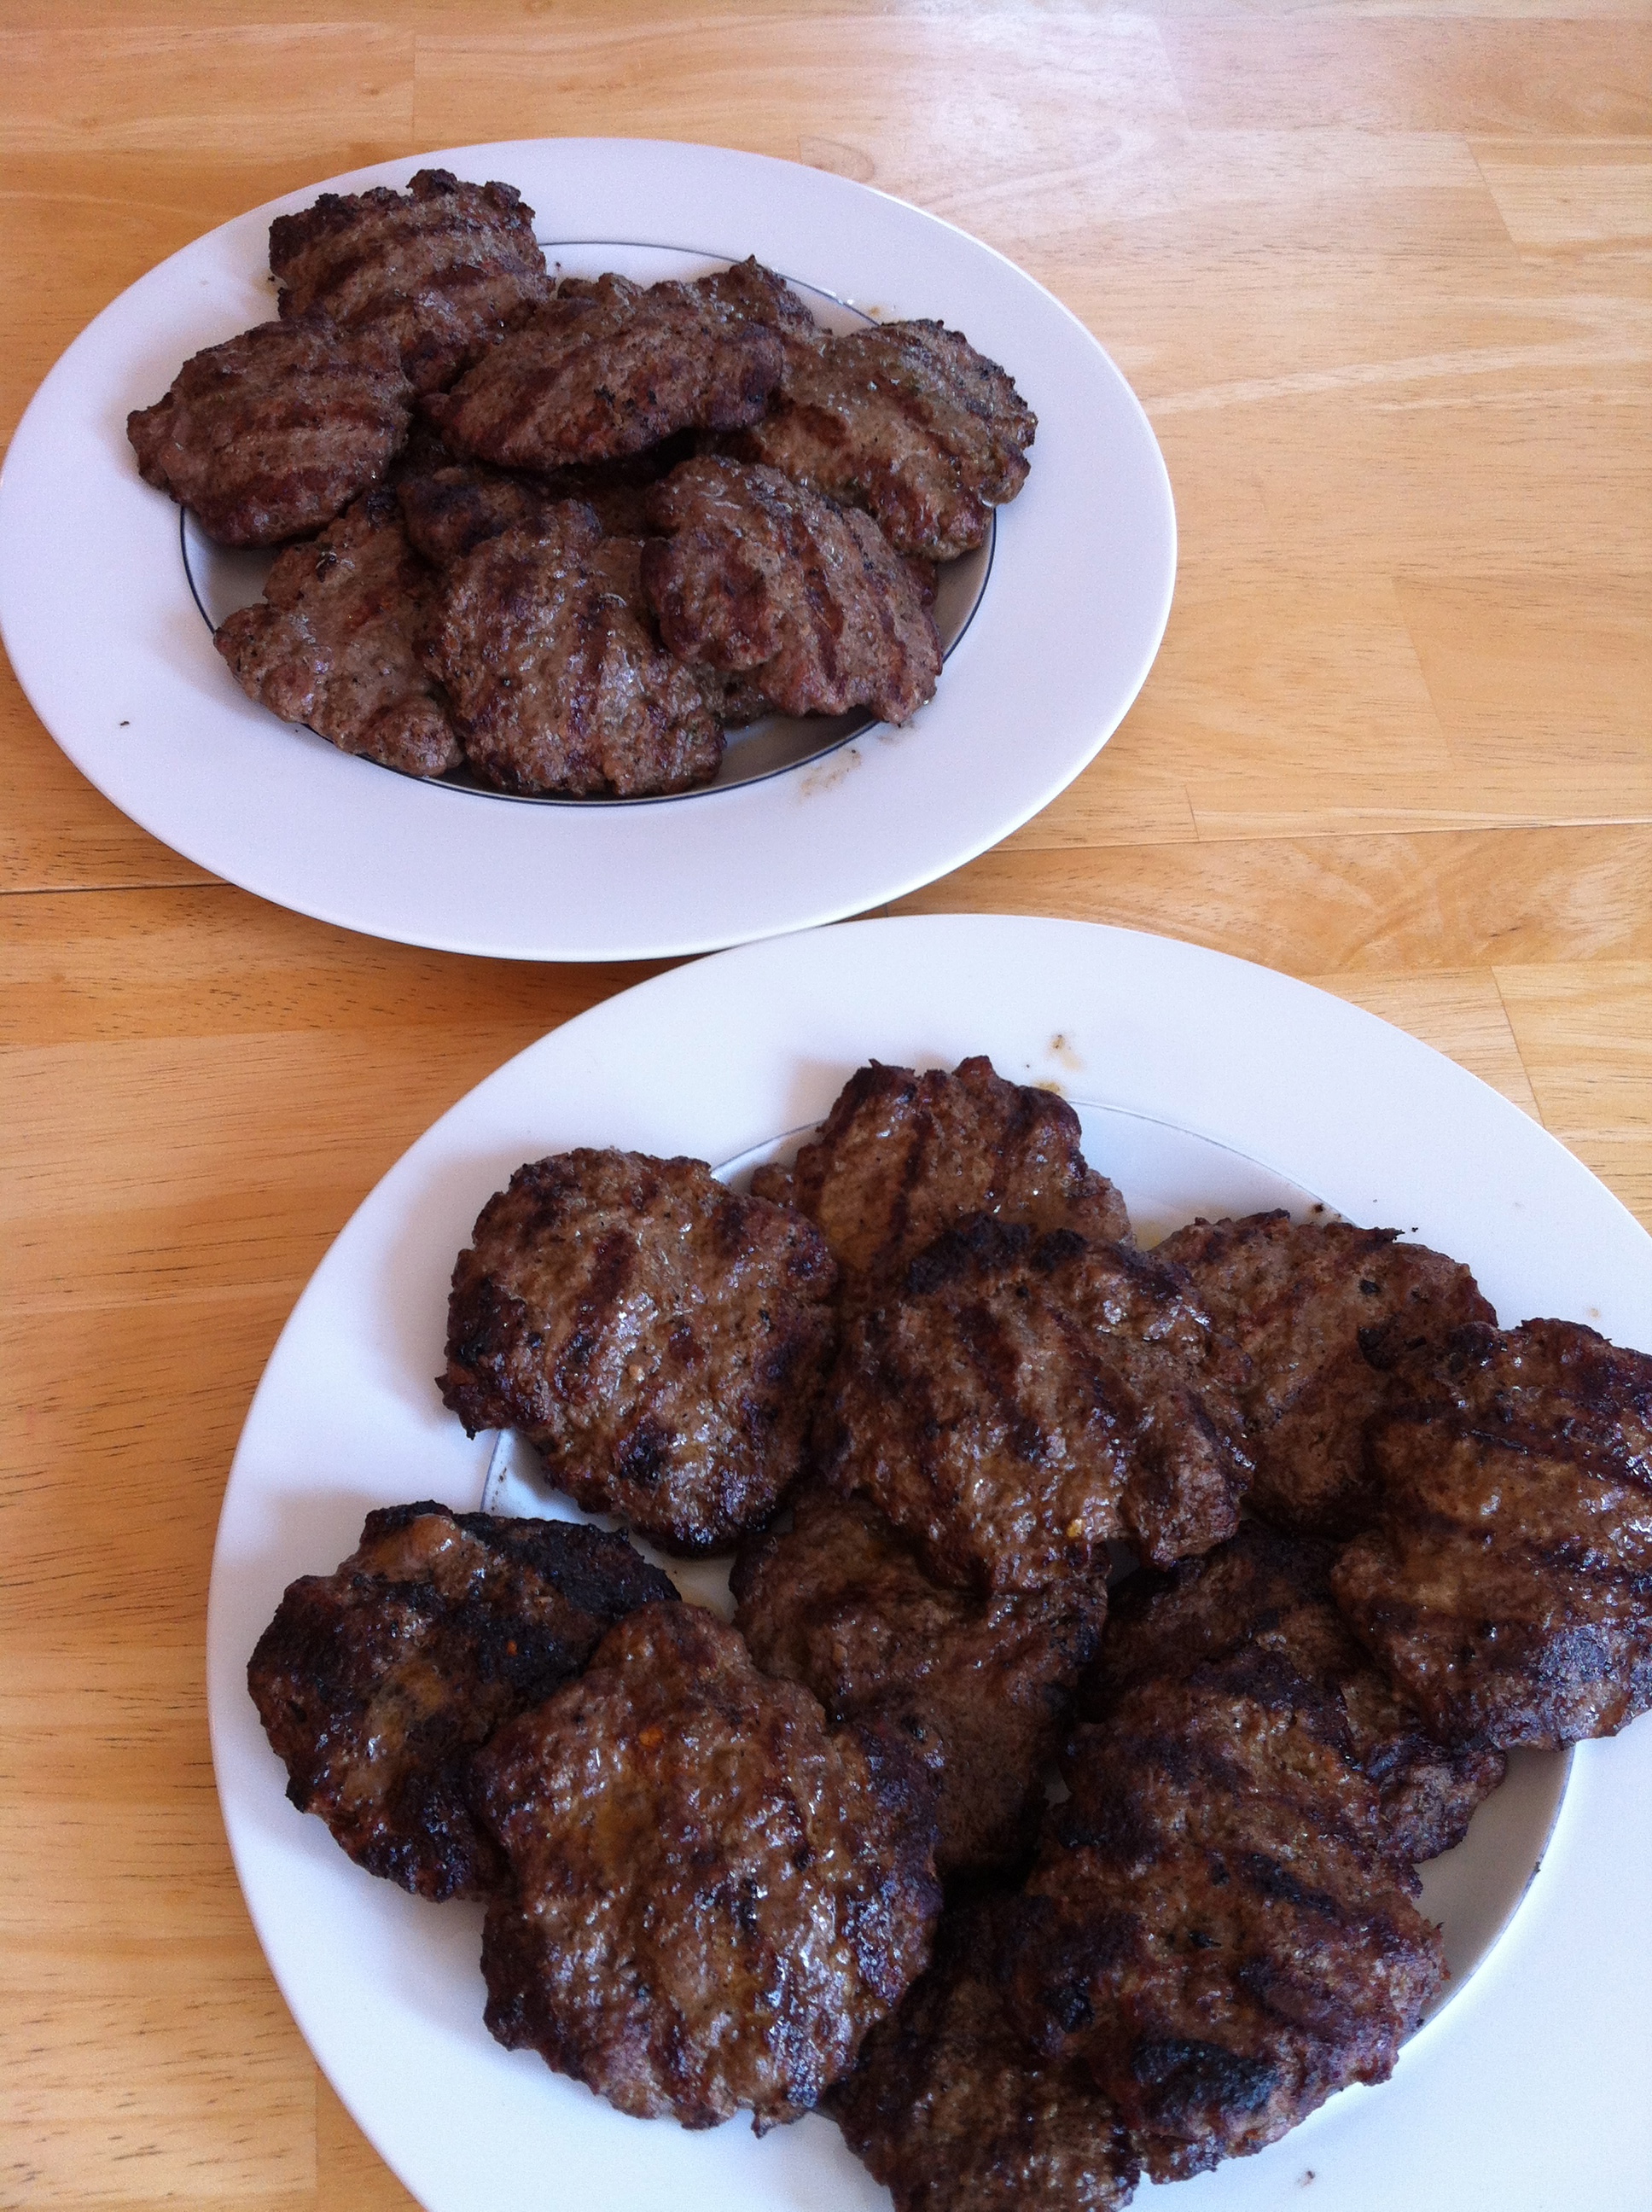
I have really hit a stride with batch cooking and freezing. It is so worth it. A little extra time up front really pays off later. I used to make double a recipe and have leftovers. Now I make quadruple a recipe and freeze it. And now that I’m in a pretty good rhythm with it, the return on investment is so clear. Like when everyone gets home at the end of the day and everyone is hungry and ready for dinner now – it’s awesome to just pull some frozen burger patties from the freezer, warm up some of the cooked rice that’s in the fridge, and the bulk of the work in the moment is to cook some fresh veggies. Here are some of the things I regularly batch cook and freeze. I always use a meat thermometer to indicate to me when the meat is ready, and I always label the freezer bag with the date using a sharpie marker. It feels like a real industrial kitchen around here – without all the additives.
- Ground beef burger patties – I cook 4 lbs of patties on the grill, which yields about 24 burgers. I usually season the beef with Moroccan-inspired spice blend. I freeze about 8 per quart-sized ziplock bag.
- Chicken Sausage patties – I cook 3 lbs of ground chicken and season them like breakfast sausage. These are pan fried in coconut oil, so they take more effort than just throwing burgers on the grill – but certainly worth it. Again, about 8 fit into a quart-sized ziplock bag. The yield from 3 lbs is about 18.
- Chicken Breast – I buy about 24 chicken breasts, drizzle them with olive oil and sprinkle with sea salt, and grill them. Then I dice them and freeze one and a half breasts in a quart-sized ziplock freezer bag. I’ll get 16 packs of frozen cooked diced chicken breast. I particularly love these because of how versatile they are. I can throw them into chile, a rice dish, a quinoa dish, or a soup, and have a 20-minute meal.
- Chicken Stock – I definitely cook this in batches and always want to have it stocked in the freezer. Click here for recipe/method.
- Bacon – Find a high quality bacon and cook up 3 lbs of it. I like to buy bacon from the farmers market, or Applegate brand. I did find 3 lbs of bacon from Costco that purportedly came from vegetarian fed, antibiotic free pigs, so I tried it. I cook bacon in the oven at 375 for about 20/25 minutes in a roasting pan that has a rack. Cooking bacon in large quantities is nice because you only have to clean the pan once for all those batches! When it was cool I wrapped it in paper towel and stored in in the freezer in a gallon ziplock bag. If you’re really into it – you can use the bacon grease to cook with later, but do note that whatever you cook in it will taste like…bacon.
- Pancakes/Waffles – I make 4 times the amount listed on the mix package. I usually use Pamela’s gluten free mix because it is certified GF. I have a Belgian waffle maker that was purchased at Costco. So making waffles is actually easier than making pancakes because I don’t have to stand there and watch them for flipping. I freeze 2 in a freezer bag, and they are especially useful for school mornings for my kids. They reheat really fast in the toaster over, and they taste great. Van’s frozen waffles are certified GF, but are much more expensive than the certified GF mix.

- Whole Chickens – I’ll cook two of these on a weekend afternoon. We can eat the bone-in pieces for dinner, and then have the breasts as leftovers for cooking fajita chicken or whatever. I don’t necessarily do any freezing here because the leftovers are eaten fast enough. I have learned that it doesn’t have to be Thanksgiving to cook a whole bird. 🙂
- Cooked Rice – I don’t freeze this – but when I make rice, I always make 2 cups of rice and have it ready in the fridge for when I want to use it. I always cook it in homemade chicken broth. Again, this is great for fast meal prep, and gets paired with the frozen chicken breast frequently.
- Chili – I’ll cook a large pot of chili with the intention of freezing most of it. These work great for lunches that can be taken to work. I freeze lunch-sized portion in quart-sized freezer ziplock bags.
Chicken Bone Broth
Posted: August 29, 2013 Filed under: Poultry | Tags: apple cider vinegar, crock pot, freezer bags 4 Comments


I now keep homemade chicken bone broth stocked in my freezer. Which is funny to me because I was a vegetarian for 10 years. Then when my daughter was diagnosed with celiac disease, my perspective on nutrition really changed. And we started including meat in our diet. I think there is great nutritional and healing value in bone broth, so I feed it to my kids regularly. Sometimes they will have it on its own as soup, but typically I use it to cook rice and gluten free pasta.
Now that I have my system down, it is very easy to make. So here is what I do – you will need the following:
Large crock pot
Salt
Apple cider vinegar
3 chicken backs
1 package of chicken necks (optional)
Large metal bowl
Large metal colander
Quart sized ziplock freezer bags (about 8)
I purchase chicken backs and necks from Otto’s at the Royal Oak Farmers Market (that’s Detroit area). I usually buy 3 packs of backs and 3 packs of necks. Whole Foods did have chicken backs once – I asked at the meat counter, and she pulled them from the freezer. Using those parts for stock is the cheapest, but you can use any part of the chicken that has bones. I keep the packs of backs and necks in the freezer and take out one of each pack and put it in the fridge the day before I make the stock.
The next day the backs and necks will be defrosted enough to start the stock. I remove the packaging and place the parts in a large crock pot. I fill the crock pot with water until it is full. I add salt to the water, probably about 1 tablespoon. I also pour in about 1 tablespoon of the apple cider vinegar. This seems to help break down the bones so that more nutrients are dissolved in the broth. I then turn the crock pot on high. After an hour or so, the water will be boiling, so I turn the setting to low on my crock pot. My low setting will keep the broth going at a low boil. I leave it for 24 hours.
After 24 hours, I turn the crock pot off and remove the lid. I let it cool there for about an hour. Then I get a large metal bowl ready, lined with my colander. I pour all of the crock pot contents, the broth and the chicken parts, into the colander/metal bowl. I pull the colander up so I am left with just the broth, and backs and necks are left in the colander. I set it on the counter to cool down considerably, which takes a few hours.
When it is mostly cooled off, I use a one-cup measuring cup to scoop the broth into quart-sized freezer bags. One cup is enough for each bag because this broth is concentrated. Then all the bags get placed in my freezer chest. When I want to use the broth, I take a bag from the freezer and run it under water for about 30 seconds. That loosens the frozen broth from the side of the plastic bag. Then I slide the frozen broth out of the bag and into a pot. For one cup of rice or pasta, I use one cup of broth and one cup of water.
Gluten Free Art Supplies
Posted: August 27, 2013 Filed under: Celiac Disease | Tags: art supplies, celiac disease, colorations, gluten free, gluten free art supplies, play dough, school supplies Leave a comment
My 4 year old daughter has celiac disease. Therefore she follows a strict gluten free diet. Therefore she needs gluten free art supplies at home and at school. Of course I want her to be as creative as she likes, and safe while creating. Here is my take on gluten free art supplies, school supplies, and activity materials. I’ve included brands that I use and that work for my daughter. I purchase most of my supplies from http://www.discountschoolsupply.com and fortunately so does my daughter’s school. They have allergens clearly listed on many of their items. As a general rule, use “When in doubt, leave it out” when making choices. Also, powder free gloves can be useful in some situations, but I think it is still better to just have gluten free supplies. I’m happy to provide any supplies that need to be gluten free, but many can be provided by the school too. If I’ve missed something, please let me know in the Comments.
-Any items that obviously have wheat, barley, rye, or oats need to be avoided.
-Crayons, Markers, Pencils. Crayola and Colorations will certainly work. I don’t worry about these too much.
-Play dough/modeling clay. Crayola’s HAS wheat, Soy-yer dough does not. Colorations has modeling clay that has no gluten.
-Paints need to be gluten free. Colorations and BioColor are gluten free. I read that Elmer’s paints are not.
-Bird Seed. I look for bird seed that has no mention of gluten containing items. I’ve purchased it at hardware stores. Wash hands after use.
-Feeding animals. My child’s school brought farm animals around, which is awesome. I’d have my child use gloves if feeding animals, or wash her hands immediately after if not using gloves.
-Shaving Cream. I use Barbasol brand shaving cream for art projects. Colorations also has foaming paint, which is like colored shaving cream (and is very fun!).
-Glue. Elmer’s is safe. Colorations has glitter glue that is safe.
-Ink pads. Should be gluten free, but I don’t have a brand right now. I’d check Colorations first though.
-Dry Erase Markers. I don’t know if these are gluten free, but they leave a powdery residue, so I’d avoid them or find a clearly safe brand to use.
-Papier Mache. AMACO Claycrete is safe and can be purchased through Amazon.
-Cooking/Baking projects. King Arthur’s has a flour that is Certified Gluten Free. Betty Crocker has safe gluten free mixes. Gluten Free 123 also has safe gluten free mixes. There are other brands as well, but those are my go-to brands. My daughter should not even be present in the room if there is baking with wheat flour going on. And if baking with wheat flour was done before she is in the room, ideally the counters and tables are wiped down to remove the flour residue! Yep, she’s that sensitive. 😦 Cookies, candies, etc. for projects should contain no gluten ingredients.
-Macaroni/Noodle art. Ancient Harvest, Tinkyada, Glutino all have gluten free noodles.
-Silly putty. Needs to be gluten free, but I don’t know of a specific brand.
-Sidewalk chalk. Colorations brand is safe.
-Bubbles. Not totally sure if mainstream bubbles have gluten or not – so I play it safe. I purchased a bubble powder from Discount School Supply that I verified to be gluten free. It’s called “Instant Bubble Powder” by Cricket Hill, Inc. I cleaned out mainstream Bubble containers and pour the gluten free solution in them. Also liquid dish soap will work – Dawn or Palmolive.
-Stickers. I just take the risk here and assume that stickers are gluten free.
-Temporary Tattoos are safe for use.
-Sunscreen. Not an art supply, but worth mentioning here. I use California Baby.
Having said all that – now go and have fun playing, creating, and being care-free! Right?! It’s a crazy world we live in, that’s for sure. 🙂

Recent Comments